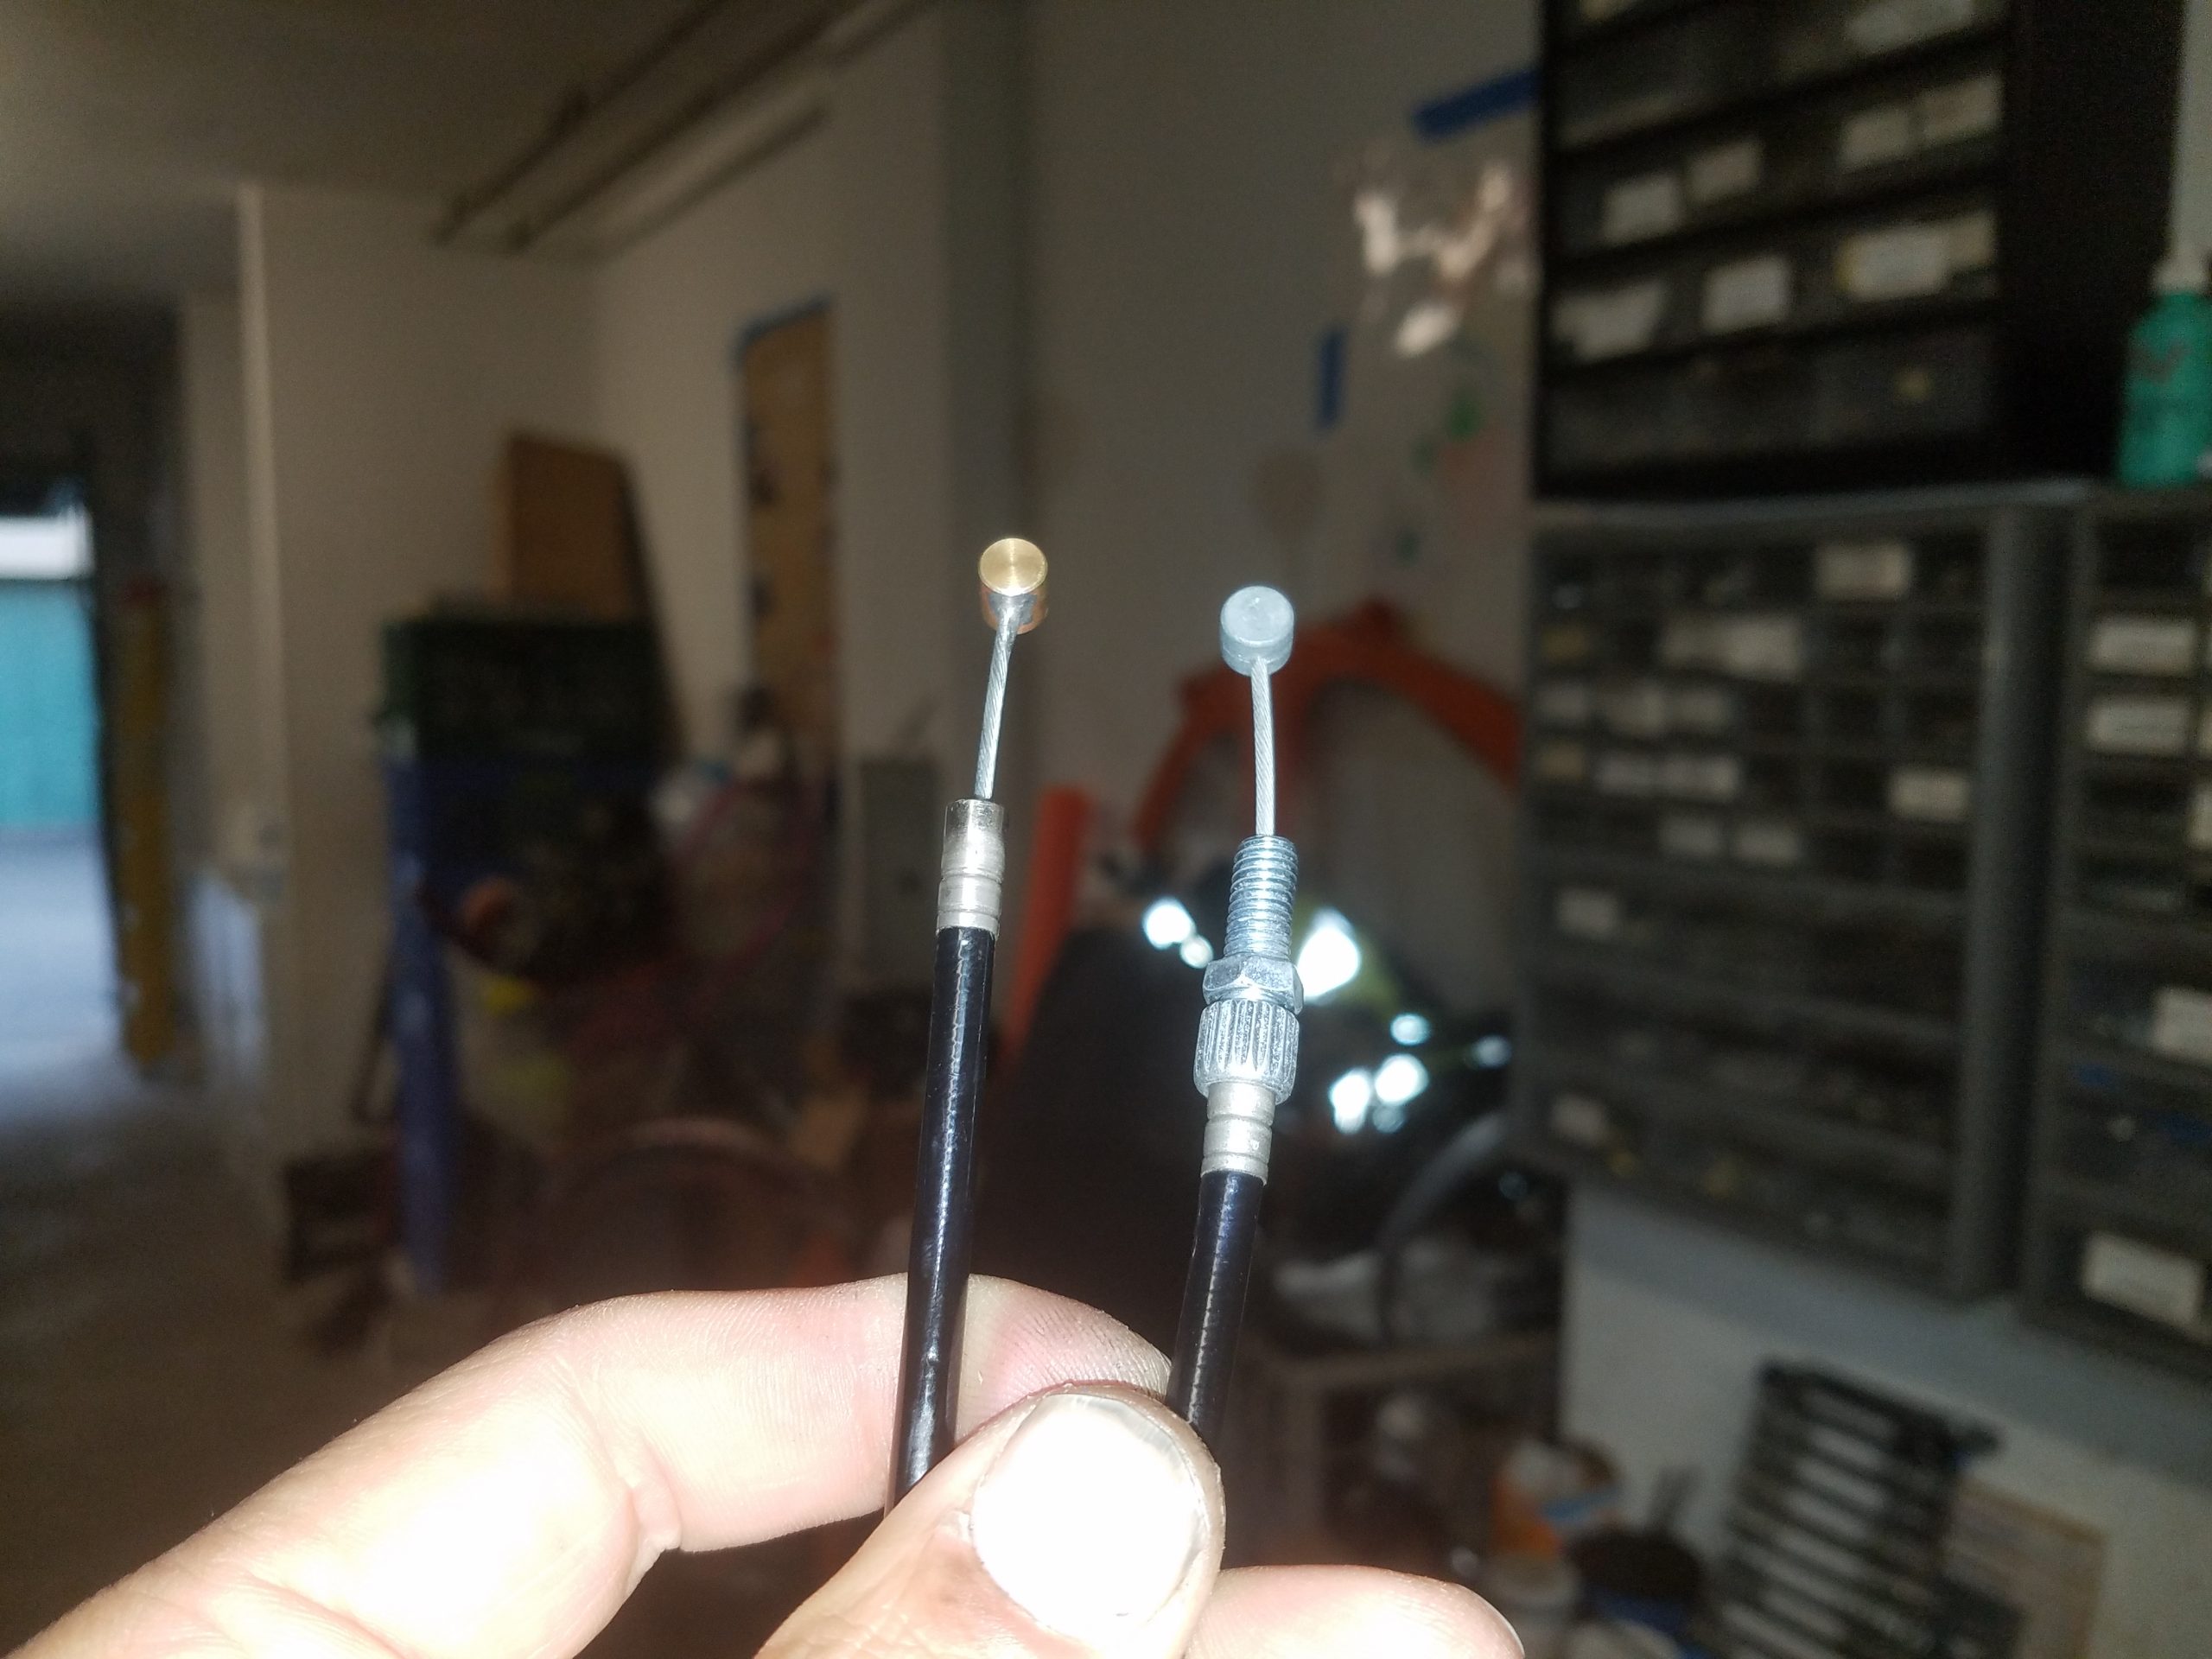
The brass replacement cable end installed and held up next to the other end of the cable.
Years ago, I happened upon the craft of repairing Bowden control cables. A couple of old motorcycle mechanics told me not only was it possible, but they themselves used to do it all the time “back in the day”.
I read up on the topic (i.e. old forum posts online) and found Flanders Cables – retailer of control cable parts and cable soldering supplies.
Bowden control cables are a ubiquitous part of modern civilization. They are in absolutely everything: from baby strollers and bicycles to high end automobiles. When one end of a Bowden control cable snaps off, however, most of us out in consumer-land are out of luck when it comes to finding a replacement.
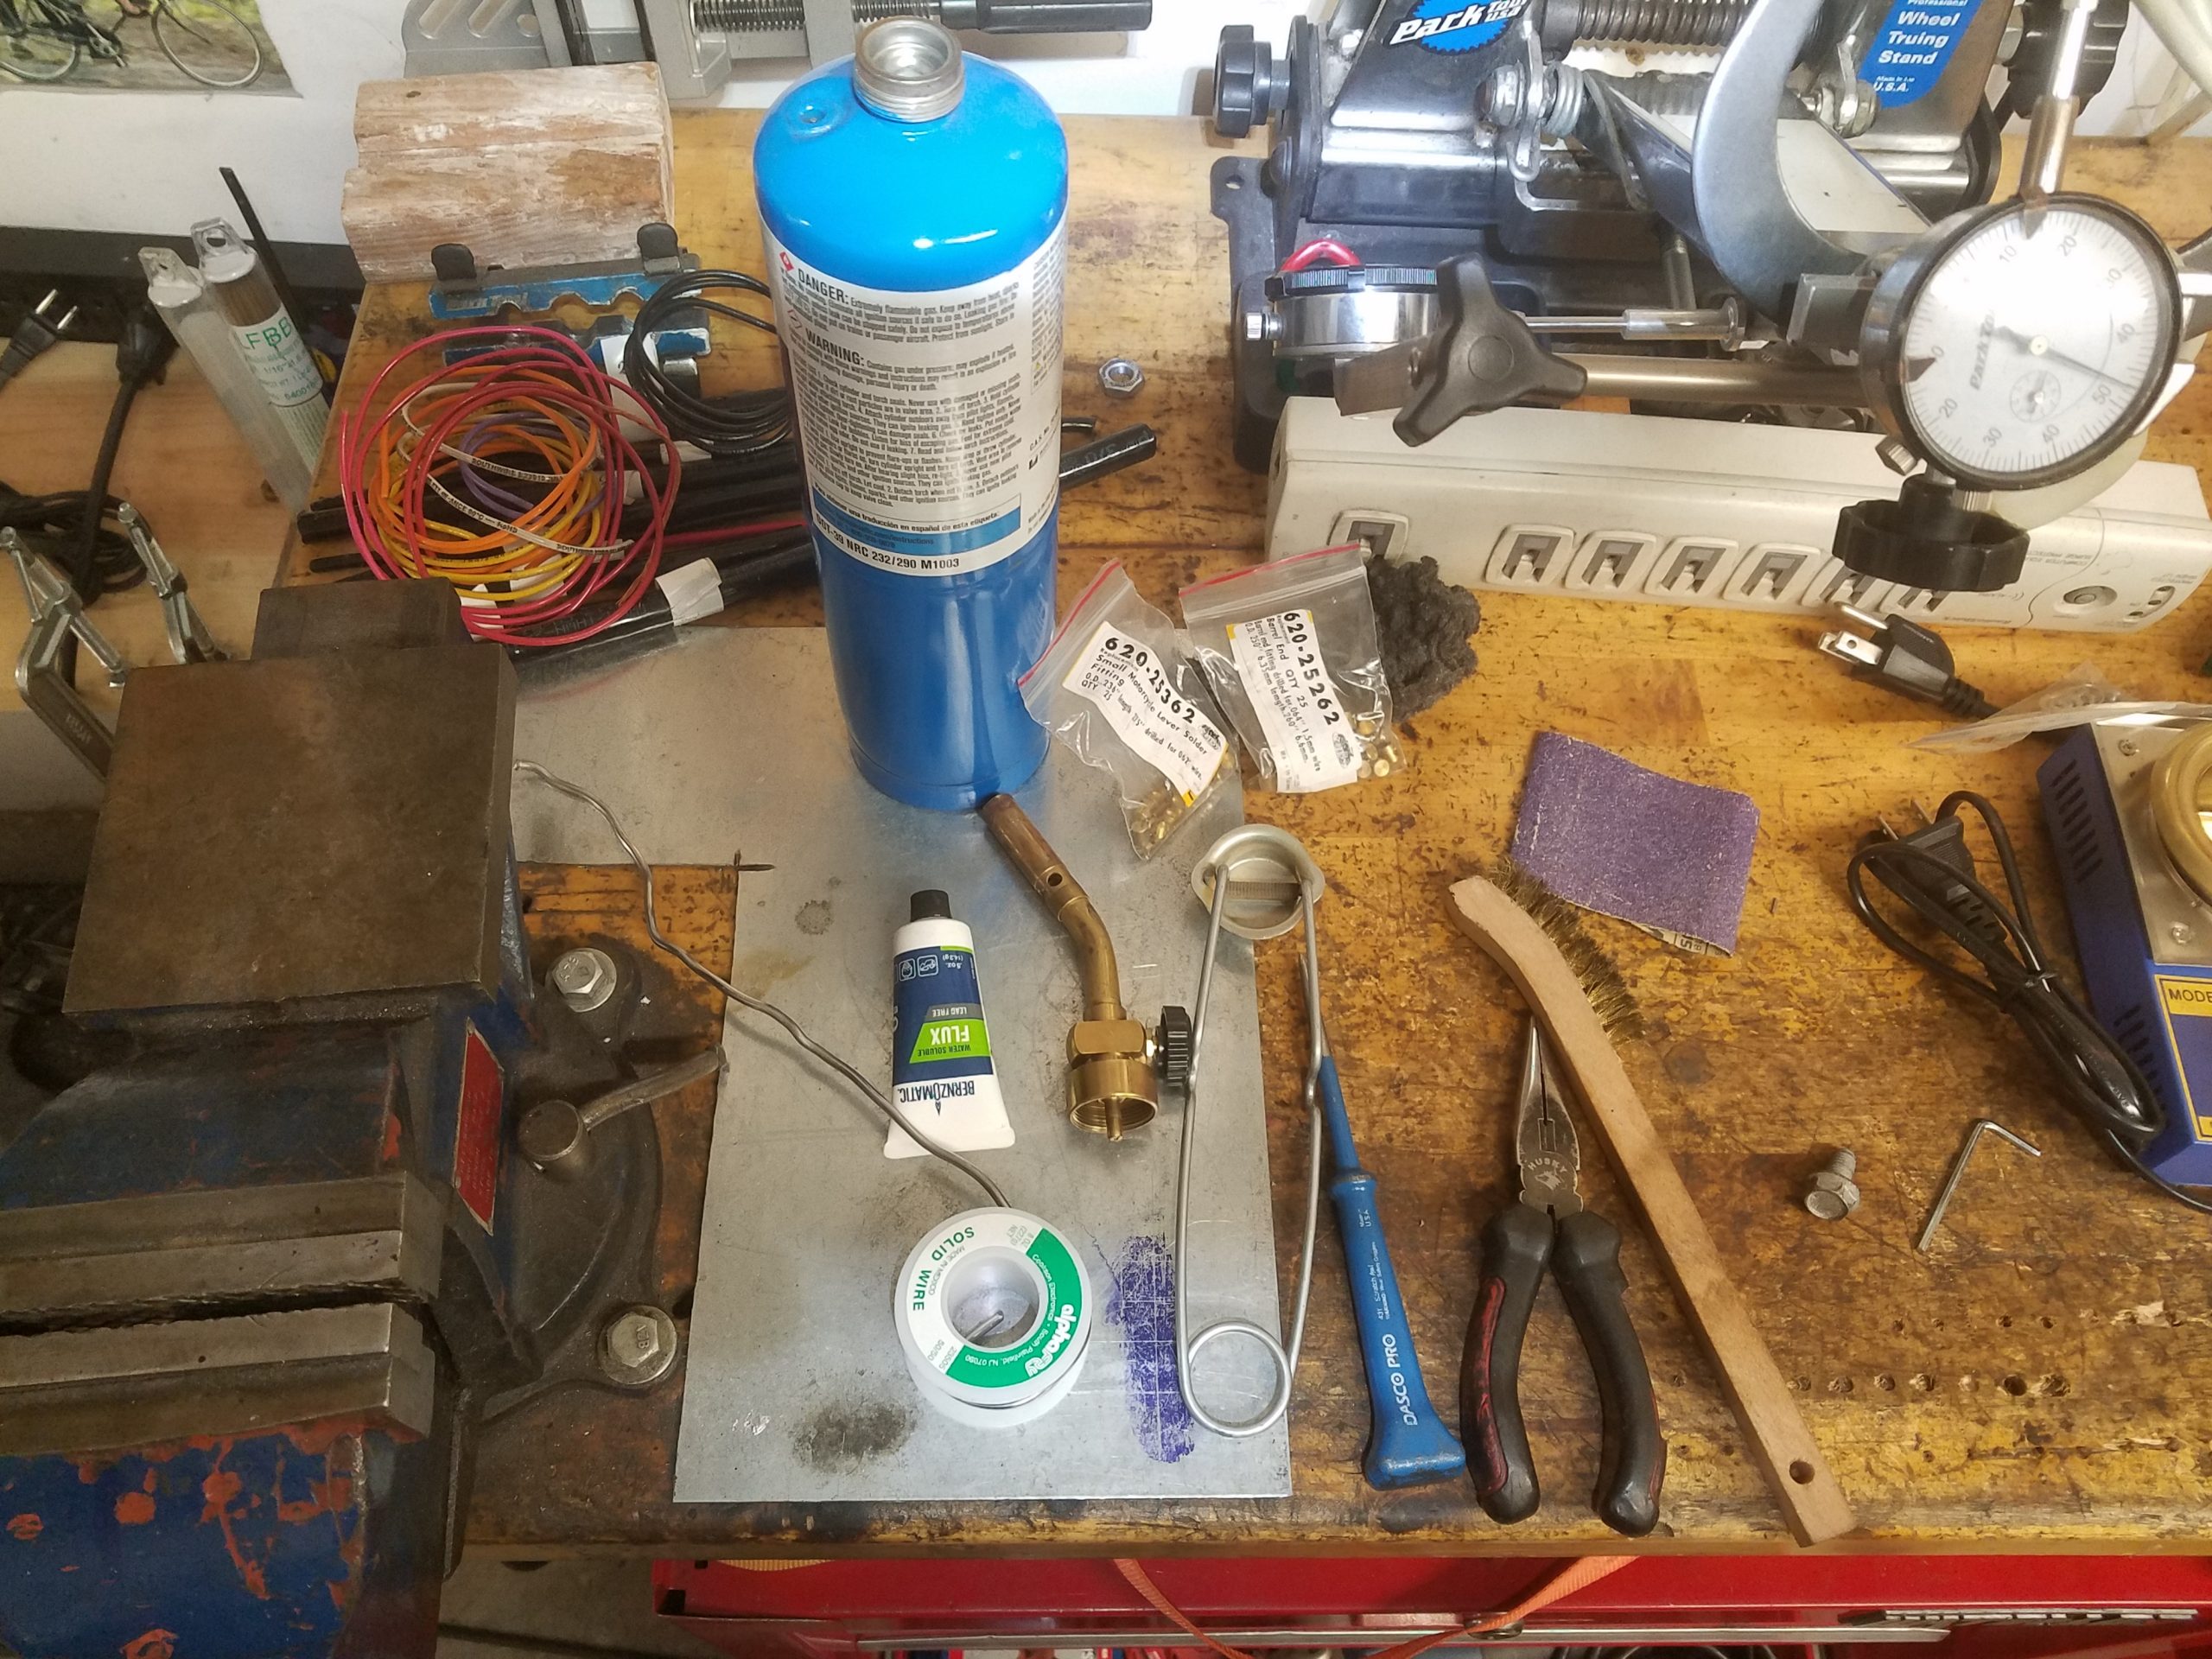
The supplies I used to effect the repair of the cable.
On bicycles and baby strollers, brake cable inner wires are typically 1.5mm in diameter and made of either stranded galvanized or stranded stainless steel. In case you are wondering, shift cable inner wires are typically 1.2mm in diameter (Campagnolo wires are an exception – 1.1mm in diameter).
There are lots of different types of control cable ends. One of the most common brake cable inner wire ends is the “barrel type”. It looks like a barrel with a hole drilled through the side. These barrels are sized to fit into special grooves in brake levers or other parts of a machine, and so come in a variety of dimensions.
I used Flanders Cable part number 620-2562 as a replacement cable end for this repair.
To heat up the cable end, I used a small tank of propane gas. You can see the torch tip I used in the image above. The flint striker I used to light the torch is in the picture above as well. You need to use the flint striker to light the gas coming out of the torch tip. You have to go very easy on the heat from the torch to avoid changing the temper of the steel wire you are soldering (too much heat and it will become brittle and thus unusable as a control cable).
Soldering requires some flux (a chemical paste, gel, or liquid that removes oxidation from the metal you are heating up to allow the solder to bond with it). I used some Benzomatic lead free water soluble flux I picked up at the local Home Despot. A little dab inside the pre-drilled hole in cable end worked just fine.
In the image above there is also some 50% tin / 50% lead solid wire. I used this as the solder in the repair.
On the work bench you can also see a blue DASCO PRO steel scratch awl. I used this to gently unwind and peen open the strands at the very tip of the steel wire inserted into the replacement cable end. Doing this prevents the wire from pulling back out of the hole in the cable end.
The needle nose pliers were used to hold the work as I work the scratch awl and to hold the piece as it cooled to inspect it. The brass brush was used to clean off the slag and soot once the solder had cooled.
I made a new control cable for this stroller to go with this repaired cable as a back up in case it breaks again. I still have a small supply of the bulk quantities of control cable wire, housing, ferrules, cable tips, barrel adjusters, and other fittings for bicycle control cable systems.
If you have ever sweated copper you already have 100% of what you need to effect this type of repair (except for the cable end and other small control cable-specific parts – which are easy enough to obtain at bike shops or online). Jewelers can also easily handle this type of work as well.
There is not much value in this sort of fixing and mending other than the good feeling you get from helping a neighbor or family member out. Job done, I suppose.